| Українська | English | |||||||||||
|
|||||||||||
| News | About company | Service-centre | OB Van/SNG Rental | NextGen Energy Solutions | Contact us |
|
|
Engineering Service, Inc.
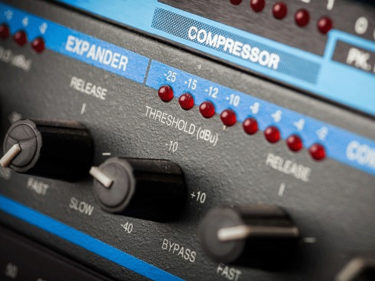
» News News An audio compressor is one of the most important parts of sound design and mixing, but it is also one of the most misunderstood and mis-used. Compression is one of those things that, by far, takes quite a bit of work to wrap your head around. The fundamental principle of compression is that it is used to control dynamic range within a piece of audio. This could be anything from dialogue to music and allows you to keep full control over fluctuations in loudness. Today’s article aims to break down the art of compression and discuss the standard parameters of a compressor unit.
Compression Parameters So let’s dive right into this topic with the typical parameters you will find in a compressor plugin or hardware unit. I won’t be covering every possible control you might come across, as some units have their own intricacies that make them unique, but I will cover the important elements that you’ll want to grasp. First off, I’d like to break compressors into three distinct sections:
If you can deal with these elements individually and understand how they work together, then mastering compression should be a breeze! Input and output First off, let’s take a look at input and output levels. This is by far the simplest section of any compressor but something that is largely overlooked when it comes to control. If our input signal is very low – let’s say -24dB – we’re going to have to adjust other parameters quite a lot before we even see anything happening. By doing this, we limit the range of control in knobs such as threshold. If our input signal is starting to get the compressor's needle moving just as we start to dial in the threshold, then we’ve got lots more room to keep dialling and get a dramatic effect. This is incredibly handy when dealing with dialogue in a huge dynamic range. Output level is a little simpler. As per proper gain staging, you just want to use this control to make sure the relative levels of your signal are the same before and after the compressor. This will allow you to fully understand what the compressor is doing without any loudness issues. The next and probably most important section of any compressor is the actual compression level controls. These are made up of the ratio, threshold, and make-up gain knobs. These three are what let you set how much compression you want, how aggressive it is and how much ambience you want to bring through. My advice is to start with ratio. This is you making an initial decision about how strong you want your compression to be. It is something that is easy to adjust later on if you misjudged it. As you’ve probably worked out, the ratio you sent is how much compression you want to apply relative to the incoming signal. For example, 3:1 means for every 1dB above the threshold, the signal is reduced by 3dB. Not too complicated, right? Threshold Next, we move onto setting the threshold control. This acts as a position from which you want the compressor to actually kick in. Let’s say you’ve got a piece of dialogue with a few parts that are much louder than the rest. Perhaps an argument between two people. Compared to the normal dialogue level, these loud sections are too loud and the dynamic jump is distracting for the piece. By setting your threshold to a level that will only be active during these loud parts, you can make sure to only reduce the level of the parts you want, making the entire conversation a little less aggressive in the loud parts. This is also where you can go back and change the ratio if needed. If the compressor is ducking the loud sections but not enough, turn up the ratio. If it’s too aggressive and makes the whole piece sound dull and without dynamic-less, turn the ratio down. Make-up gain Finally, we move on to make-up gain. This is the act of dialling in some of the level that you lost in ducking certain sections. However, the common mistake here is to think of it as a way to counteract the compression to achieve the actual level you wanted. If you’re not hearing what you want from just setting the ratio and threshold, you need to go back and re-adjust some stuff. Your make-up gain really wants to be used to bring back some of the quieter, more ambient sections of the audio signal. As your compression is applied to the louder sections, you reduce the overall dynamic range of the piece which can leave things a bit quiet and subdued. Adding in a touch of make-up gain to the whole process helps to bring things back up to the original level without having those sudden and distracting dynamic jumps you had before. Attack and release Now it’s just the attack and release settings left to set. You can think of these as controls for the speed of the compressor. The attack dictates how fast the compressor kicks in, and release controls how slowly the compression relinquishes. Typical uses for your attack and release settings are going to be matching the rhythm and flow of the audio you’re compressing or shaping transients to achieve impact and presence. Let’s go back to the dialogue we were discussing earlier. If we’ve got sudden, loud sections to tame, we’re going to want a fast attack time so that none of them slip through. We’re also going to want a relatively fast release time so that the compressor isn’t still active in the next bits of dialogue if they are quieter. In this case, it’s all about matching the flow of the audio so that the compression only occurs when you want it to. Another regular use for compression is transient shaping. By this, I mean taming and controlling the peaks of audio signals to improve power and dynamic density. This is going to be really handy when it comes to thinks like Foley. Being able to quickly compress and boost impact sounds like punches is going to give them more body and more impact within the scene. In this case, fast attack and fast release settings are going to squash the onset of the signal which internally allows the whole sound to be boosted with make-up gain. A dynamically denser sound is always going to come across more powerful. Summary Compression isn’t quite as difficult to learn as it’s made out. If you follow some generally simple rules about the order in which to set things up, you should in no time be a compression king! Start with your input level control and make sure to bring your signal up or down to a healthy level. If you can set your peaks to around -6dB, you’re all good. Next up it’s time to set the ratio. Smaller numbers mean less aggressive, larger numbers mean more aggressive. Make a decision on how much you want to clamp down and we’re on to threshold. Dial in the threshold until you’re achieving the desired amount of reduction. Now you can use make-up gain to boost the entire signal, bringing through some of the more ambient qualities of the recording. Finally, tweak your attack and release settings to adjust how quickly or slowly your compressor is acting. With that all set, you’re good to go! « To the list of news |
|
|||||||||||||||||
 |
+38 (044) 593-18-20 +38 (073) 593-18-20 +38 (096) 532-96-82 +38 (095) 532-96-82 Service center Telegram @Engineer_Service |

|
|
|||||
 |
e-mail: engineer-service.tv 15 Vavylovykh str., Kiev, 04060, Ukraine Authorized service centre of Panasonic, Sony, JVC, Fujinon, Canon |
|||||||


